Did you know that Anthony and I once gutted a house by ourselves? We ripped out every single lathe-and-plaster wall in that little old house, and all the old insulation. We wore full-body Tyvec suits and asbestos masks, to avoid itchy and toxic stuff as much as possible. Our neighbors would eye us suspiciously as we carried out bags of debris in these get-ups. We looked like extras from movies about pandemic contagions.
We replaced every single fixture, receptacle, and electrical wire all the way back to the circuit panel, re-organizing and modernizing all the circuits as we went. Anthony cut out the top half of a non-structural wall between the kitchen and dining room using a sawzall and we turned the bottom half into an island-like separation. We determined the wall was non-structural by talking about it (“yeah, I think it’ll be fine”) and then nodding in agreement before Anthony reved up the saw. That was exciting. We installed insulation and drywall and windows and doors and kitchen cabinets. We built new aprons and stools and trim for all the windows. We laid tile all over the bathroom. We built a mantel for the fireplace. We recycled original baseboards; we stripped, refinished and repurposed them to build doorway surrounds and other trim.
We hired a plumber to replace all the plumbing, including the toilet stack, because ew. Just because I like to talk about poop doesn’t mean I want to touch it.
Then we moved to St. Louis and had a baby. Actually, now that I think about it, I renovated our kitchen in St. Louis while I was pregnant with Jesse. I remember our next-door neighbor having an anxiety attack while I wielded a circular saw in the back yard. I’m not sure what she was so worried about. I was only 5 months pregnant and there was plenty of clearance for my uterus.
I still have all the power tools and equipment, and lots of spare hardware in boxes that used to be well-organized. With two kids in the house, there’s little time for much DIY work. Still, sometimes a girl’s got to get her hands dirty. I decided last week that I needed to install an outlet next to an existing switch in our dining room. It was the right kind of project for me — not complicated, and limited in scope. I figured it would take me a few hours on Friday and Saturday, including a little extra time to read through my electricity books and make sure I was doing things right.
The work went relatively smoothly. Nothing caught on fire and I didn’t blow a single circuit, and also I didn’t catch any shocks on my own body, at least not for the first two days. I did have to cut out a larger chunk of drywall than I wanted to, because I couldn’t manipulate the old armored cable wiring into the new electrical box as easily as I had hoped, and I needed room to reach into the wall cavity. So I had to make some drywall repairs too. Those can take a while to do well.
How many tools does it take to install a single electrical outlet? This many:

The pry bars were for taking out the original electrical box, which was attached to a stud. The numerous screw drivers and pliers — well you know how it goes, you can never have enough of those things around. I really did use each of these tools. Otherwise, they wouldn’t have been spread all over the dining room floor when I was done. Except I can’t remember what I used the hammer for. Give me a moment to recollect.
Nope. No idea why I had the hammer out.
How many trips to the hardware store does it take to install a single electrical outlet? Final tally: five. Not bad. I spent about 40 dollars (including drywall repair materials), which is still substantially less than paying an electrician, and the job turned out pretty neatly:
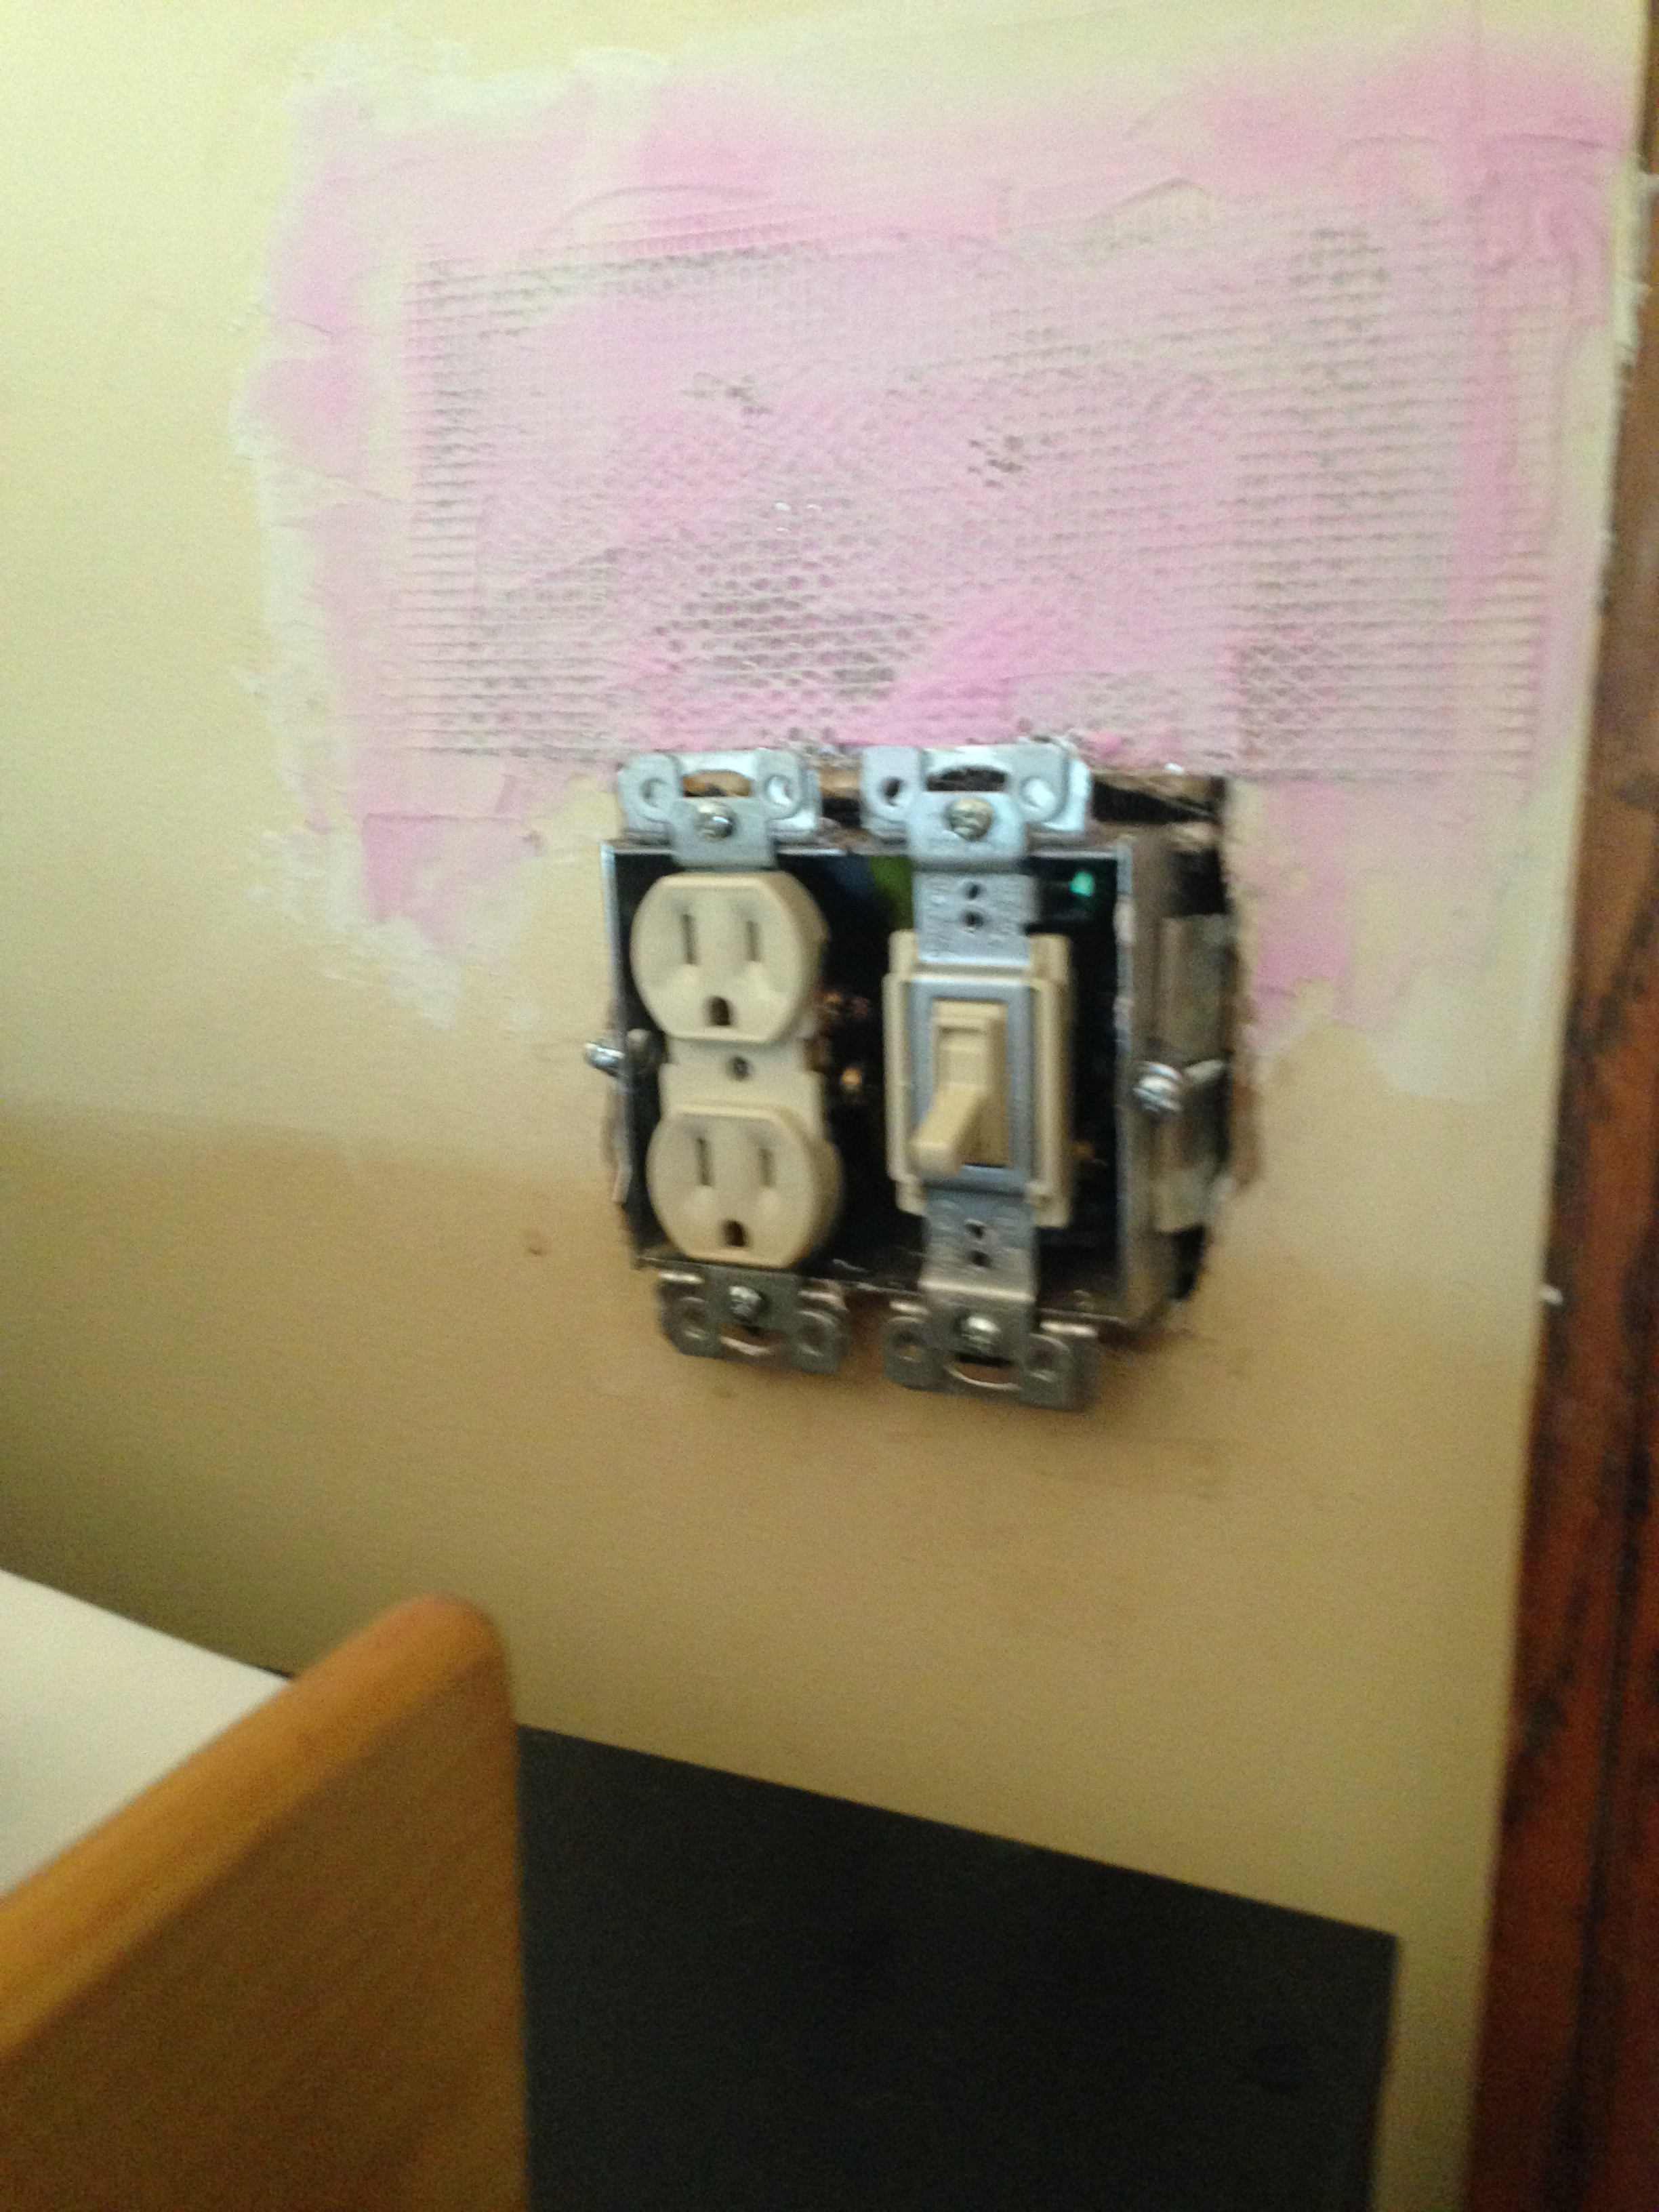
it took two days to properly plaster over the drywall patch. Next up is sanding. i wont be able to do that for several days, so I pushed the new electrical box in and put the cover on for now. And then I noticed…

Huh. I guess when I was prying out the old box I must have damaged the opening on the right side. It’s hard to photograph. Can you see the little hole along the right edge? The electrical cover isn’t big enough. Why can’t they make the covers bigger? Why?
Looks like I’ll be taking the cover off and doing some more plaster work before I sand. Maybe it’ll take a couple more days, and maybe I need to buy a little more drywall compound. I guess it takes six trips to the hardware store.
And then I’ll be done. Except also I’ll need to touch up the paint. That’s right. I don’t have any matching paint handy, because it’s from the prior owner. Anyway the color is ugly. It looks like I’ll need to repaint the entire dining room. I better get some paint cards when I go back to the store for more drywall compound.
As I’m thinking this through, it occurs to me that the dining room is part of a great room, which includes the living room. So I’ll need to repaint that too. Also the great room walls are contiguous with the stairway walls, so I guess I need to repaint those too. It’s a staircase that turns 180 degrees halfway up, so that ceiling gets REAL high. I wonder how I’ll deal with that.
I know. I’ll just repaint the ceiling and the hallway at the top of the stairs too. If I do all that in one color, I can just use a roller and paintbrush taped onto a long, long stick (this is what duck tape dreams are made of).
If painting goes like it usually does for me, some paint drops will fall on the wall-to-wall on the stairs and upstairs hall floor. It’ll be ruined, but maybe that’s a good thing too. The carpet is ugly, and there’s hardwood under it. Might as well rip that up and refinish the wood floors. I bet I can do that in a couple weeks. I just need to rent one of those power sander thingies.
I should be done with this limited, uncomplicated little job in 6 to 9 months. I’m so glad I installed the new outlet. It’s already adding value and much-needed convenience to my life.
